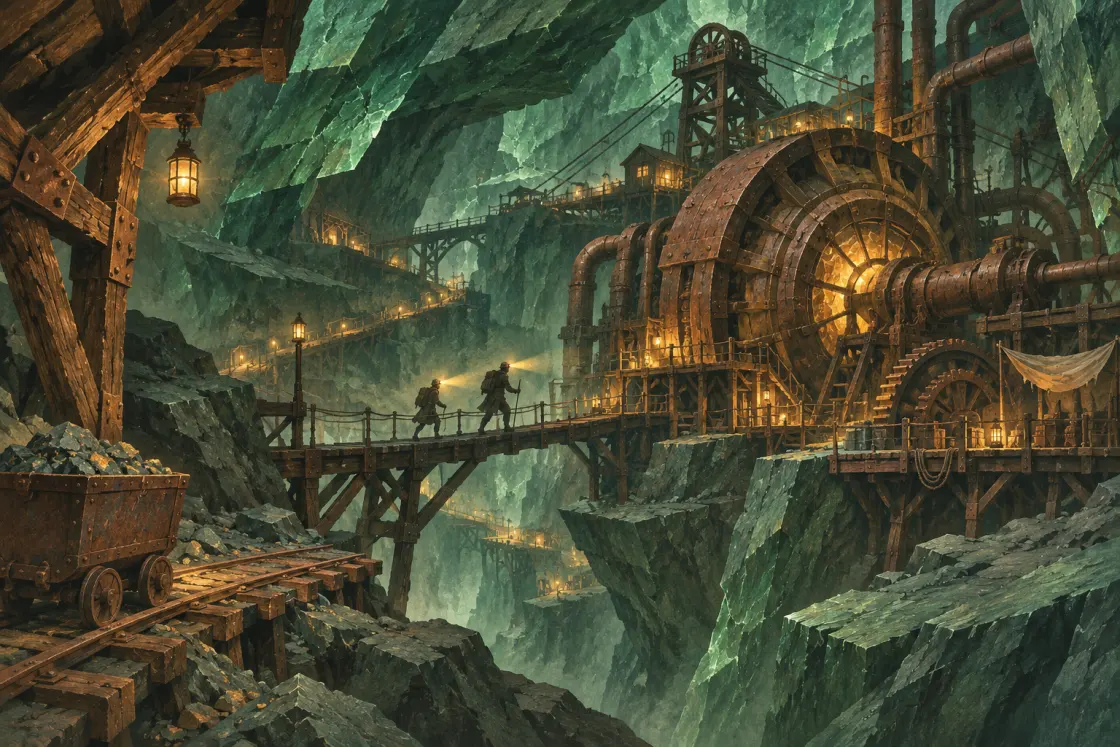
The Fracture Engine playtest
Play the extraction prototype · Research checked 6 November 2026
The three standard missions and seven hard contracts ask when a valuable haul is worth a worse route out. Vale handles the primary objective. Rook works on machinery and optional equipment. Each mission starts with a known timetable and gives both crew one action per turn. The standard missions are open from the start. Clearing Lower Works opens Sealed Works, clearing Floodline Rescue opens Spring Tide, and clearing Blackout Relay opens Live Freight and Interlock Station. Live Freight opens Bus Coupler, and Interlock Station opens Double Feed. Clear both of those and own the Pin and Twin Jammers to open Cascade Transfer.
Bank and loadout
- The first successful standard extraction pays two chits. Most hard contracts pay three. Cascade Transfer pays five when both stages are complete. The first full clearance adds one more chit per mission, even if the base payout was already earned. The board keeps each mission’s best result. Repeating a result adds zero chits.
- Each purchased tool stays available. Equip one before starting a sortie. The Haul Line, Surge Suit, Recovery Hook and Scanner Jammer each cost two chits. The line adds a tile to one move. The suit protects one crew member from one surge or arc. The hook lets Rook retrieve one optional item from an adjacent tile. The scanner jammer suppresses one live arc.
- Clear Live Freight to unlock the Pin Jammer for three chits. It protects one selected tile on the current and following turn. Other tiles stay live. Clear Interlock Station to unlock the Twin Jammer for four chits. It suppresses two whole arcs per sortie, with an online scanner required for each shot. All jammers take the scanner offline on the turn after a shot. Charges reset on a fresh sortie.
- Extract successfully to bank chits. Failure keeps your gear and balance. The browser remembers those and your records, including credits for milestones recorded by the older version. Reloading starts a fresh sortie. Cascade Transfer saves its handoff and reopens stage 2 at turn one.
Research translated into rules
| Reference | What the source establishes | What the prototype tests |
|---|---|---|
| Doom Breaker | Zephyr returns to a weaker starting position with memories. A reconnaissance team brings night vision and mana detection to the dungeon. Zephyr infers a risk from whom he remembers seeing later, so his forecast reflects evidence he has. | The player begins with an explicit survey report that puts the exact collapse turn on each tile. The report helps the player route the crew but cannot rescue anyone left in the danger zone. WEBTOON episode 3 · WEBTOON Unscrolled volume 1 |
| Necromancer, the Ultimate Scourge! | Lin elects Nightmare in the mine. The existing chapter study records that clustered enemies reward area attacks while the chief’s wide attacks and knockback make position important. In the following Chinese exam chapter, higher difficulty can improve the result and yield points usable after admission. | The optional core pays for the risk in the final report. The player knows before committing what the optional objective costs in time. The Rigger changes the map, while the Archivist takes an action that the Rigger cannot perform. WEBTOON episode 5 · KuaiKan original chapter 9 |
| Into the Breach | Subset describes turn-based combat where the incoming attacks are visible before they resolve. The player also needs to protect civilian buildings. | Mark the upcoming hazard on the map and keep action and resolution separate. This gives the player time to see whether a forecast tile still contains one of their crew. Subset Games’ official store description |
| Deep Rock Galactic | Ghost Ship describes Salvage Operation as recovering equipment from a failed mission and repairing the drop pod to bring it home. | Count the haul only when the crew extracts. Picking up the optional core puts the crew on a different route with a later exit. Ghost Ship Games update archive |
The comics and shipped games are references for the mechanics. The crew, mine, map, forecast and objectives in this slice are original. The prototype uses a fixed report so a second attempt can test a changed decision on the same layout.
Lower Works · collapse and permanent route loss
Select a crew member before issuing a move or special order. The interface switches to the other ready crew member after the first order. End each turn after completing the listed actions. On the last listed turn, choose Extract crew before ending the turn.
| Turn | West lift · ledger only | East hatch · ledger and core |
|---|---|---|
| 1 | Vale to B2. Rook waits at A3. | Vale to B2. Rook to C3. |
| 2 | Vale recovers the ledger. Rook waits. | Vale recovers the ledger. Rook shores D3. |
| 3 | Vale returns to A3. Extract. | Vale to C3. Rook to E3. |
| 4 | Vale to E3. Rook to F2. | |
| 5 | Vale to G3. Rook rigs the core. | |
| 6 | Rook to G3. Extract. |
For a failure case, send Rook to D3 on turn two without shoring and end the turn. D3 closes and the dispatch identifies Rook and the location. Continue ending turns at the west lift without the ledger to verify deadline failure.
Floodline Rescue · a survivor changes movement
The water hits marked cells at turn end. A surge does not block the tile afterward. The pump at C4 opens the middle floodgate and diverts surges three and four. The southern spillway can get the crew past the gate without using the pump. Once Vale collects the trapped surveyor at F2, Vale can move only one tile per turn. Only the east hatch counts.
| Turn | Pump route with the optional pressure recorder |
|---|---|
| 1 | Vale to C3. Rook to B4. |
| 2 | Rook to C4. Vale waits. |
| 3 | Rook starts the pump. Vale crosses to E3. |
| 4 | Vale to F2. Rook to E4. |
| 5 | Vale escorts the surveyor. Rook to F4. |
| 6 | Vale to F3. Rook recovers the pressure recorder. |
| 7 | Both to G3. Extract. |
For an unpumped rescue, move both through B4, D4 and E3 on turns one through three. On turn four send Vale to F2 and Rook to G3, then escort the surveyor on turn five and take the two remaining turns to reach G3. End turn two with Rook still at B4 to check surge failure.
Blackout Relay · each specialist has an assigned exit
The crew must extract from two different pods in the same turn. The arcs do not permanently block tiles. Grounding at D4 suppresses arcs three and five and unlocks the optional capacitor. Rook can avoid grounding if both crew take the shorter exit plan and leave the capacitor behind.
| Turn | Grounded route with the optional capacitor |
|---|---|
| 1 | Vale to C3. Rook to B4. |
| 2 | Vale to C2. Rook to D4. |
| 3 | Vale recovers the register. Rook grounds the relay. |
| 4 | Vale to pod C1. Rook to E5. |
| 5 | Rook disconnects the capacitor. |
| 6 | Rook to pod F5. Launch both pods. |
To leave early, send Rook from D4 to F4 on turn three while Vale recovers the register. On turn four move Vale to C1 and Rook to F5, then launch. End turn three with Rook ungrounded at D4 to verify arc failure.
Blackout Relay · use the Scanner Jammer to salvage a late crossing
The jammer shows the current arc tiles before arming. Arming spends its single charge immediately and suppresses that arc. Both crew keep their normal actions. On the following turn, current and later hazard warnings disappear from the map and forecast. The crew, terrain, valid moves, and objectives remain visible, and the arc still resolves when you end the turn. The jammer cannot ground the relay or make the capacitor safe.
| Turn | Register extraction with the jammer |
|---|---|
| 1 | Vale to C3. Rook to B4. |
| 2 | Vale to C2. Rook to C3. |
| 3 | Vale recovers the register. Rook moves to D4. Arm for D4 and E3, then end the turn. |
| 4 | Scanner offline. Vale to C1. Rook to E4. |
| 5 | Scanner online. Rook to F5. Launch both pods. |
Try F4 instead of E4 on the offline turn to verify that a hidden hazard can still catch Rook. Restart to try the other route with a fresh charge. The purchase, equip choice and best result survive reload.
Live Freight · recover both loads during the same flashover
Clear Blackout Relay to unlock the contract. Vale can move only one tile per turn with the flywheel. The motor’s turn-four arc covers both the flywheel and the logger. Ground the motor from D4 to lift the flywheel safely, or jam the arc to let both crew recover their loads at once.
| Turn | Jammed full salvage | Grounded clear without gear |
|---|---|---|
| 1 | Vale to C3. Rook to B4. | Same. |
| 2 | Vale to D2. Rook to D4. | Same. |
| 3 | Vale to F2. Rook to E4. | Vale to F2. Rook grounds the motor at D4. |
| 4 | Vale lifts the flywheel. Rook recovers the logger. Arm the jammer and end the turn. | Vale lifts the flywheel. Rook moves to E4. |
| 5 | Both to F3 while the scanner is offline. | Both to F3, leaving the logger behind. |
| 6 | Both to G3. Extract. | Both to G3. Extract. |
E2 is a legal move for Vale on the offline turn, but the return bus will arc there. A full first extraction pays four chits.
Interlock Station · open the gate and time the two pods
Clear Blackout Relay to unlock the contract. Rook must open D3 from the B4 panel before reaching the eastern sector. The gate stays open, but a separate turn-four pulse strikes both B1 and E3. Jamming gives both crew a head start on their tasks. Waiting keeps the scanner online and can still secure the optional fault recorder by the last turn.
| Turn | Jammed full clear | Full clear without gear |
|---|---|---|
| 1 | Vale to C3. Rook to B4. | Same. |
| 2 | Vale to C1. Rook opens the interlock. | Same. |
| 3 | Vale to B1. Rook to C3. | Rook to C3. Vale waits at C1. |
| 4 | Vale recovers the routing strip. Rook crosses to E3. Arm the jammer and end the turn. | Both wait. |
| 5 | Vale to C1. Rook to F2 while the scanner is offline. | Vale to B1. Rook to E3. |
| 6 | Rook recovers the fault recorder. | Vale recovers the routing strip. Rook moves to F2. |
| 7 | Rook to F4. Launch both pods. | Vale to C1. Rook recovers the fault recorder. |
| 8 | Rook to F4. Launch both pods. |
The offline feedback sweep still hits E2. Send Rook to F2 from E3 and check each crew’s assigned pod before launching. A full first extraction pays four chits.
Bus Coupler · hold one tile across consecutive pulses
Clear Live Freight to unlock the contract and the option to buy a Pin Jammer. The cabinet at F2 arcs twice. Pin F2 and stay on it to recover the key. F3 remains live on turn three and E3 remains live on turn four even though the scanner is offline. Grounding from D4 cancels the second pulse and gives the crew a route to extract with the key.
| Turn | Pin Jammer full clear | Grounded key extraction |
|---|---|---|
| 1 | Both to C3. | Same. |
| 2 | Both to E3. | Vale to E3. Rook to D4. |
| 3 | Vale to F2. Rook to F4. Pin F2 and end the turn. | Vale to E2. Rook grounds the return bus. |
| 4 | Vale recovers the key. Rook recovers the recorder. | Vale to F2. Rook to E3. |
| 5 | Both to G3. Extract. | Vale recovers the key. Rook to G3. |
| 6 | Vale to G3. Extract. |
For a failure check, move Rook to E3 on the offline turn. The pin protects Vale at F2 while Rook is still exposed at E3. A full first extraction pays four chits.
Double Feed · save a second charge for the salvage flash
Clear Interlock Station to unlock the contract and the option to buy a Twin Jammer. Use a charge for the entry flash and one for the salvage flash. Each shot has its own following turn without a forecast. Grounding both feeders from C4 suppresses those two flashes and leaves the scanner online. It uses Rook’s crossing action on turn three, moving the full clear to the last turn.
| Turn | Twin Jammer full clear | Grounded full clear |
|---|---|---|
| 1 | Vale to C3. Rook to B4. | Same. |
| 2 | Vale to E3. Rook to C4. | Same. |
| 3 | Vale to E5. Rook to D3. Jam and end the turn. | Vale to E5. Rook grounds both feeders. |
| 4 | Vale to D5. Rook to E4. The scanner is offline. | Vale to D5. Rook to D3. |
| 5 | Vale recovers the chart. Rook takes the sample. Jam and end the turn. | Vale recovers the chart. Rook to E4. |
| 6 | Vale to F5. Rook to D3. The scanner is offline again. | Vale to F5. Rook takes the sample. |
| 7 | Rook to B3. | Rook to D3. |
| 8 | Rook to B1. Launch both pods. | Rook to B3. |
| 9 | Rook to B1. Launch both pods. |
Ending turn five without firing the second charge exposes both crew to the salvage flash. A full first extraction pays four chits.
Cascade Transfer · take the isolator through two linked stages
Clear Bus Coupler and Double Feed and own both jammer upgrades. The contract issues the Pin Jammer for stage 1 and the Twin Jammer for stage 2. The crew carries the isolator across the handoff. Retrieving the optional phase map shunts the E4 branch on the next stage’s first scanner blackout. E3 still arcs.
Stage 1 · Isolator vault
| Turn | Handoff with the phase map |
|---|---|
| 1 | Both to C3. |
| 2 | Both to E3. |
| 3 | Vale to F2. Rook to E4. Pin F2, then end the turn. |
| 4 | Vale recovers the isolator. Rook recovers the phase map. |
| 5 | Vale to G3. Rook to F3. |
| 6 | Rook to G3. Extract, then choose Enter stage 2 with Twin Jammer. |
For an isolator-only handoff, move Rook to F3 on turn four and extract both crew from G3 on turn five. Either handoff saves a checkpoint. Stage 1 pays zero chits.
Stage 2 · Return shafts
| Turn | With the phase map | Isolator only |
|---|---|---|
| 1 | Vale to C3. Rook to B4. | Same. |
| 2 | Vale to E3. Rook to C4. | Same. |
| 3 | Vale to E5. Rook to D3. Jam and end the turn. | Same. |
| 4 | Vale to D5. Rook to E4 during the blackout. | Vale to D5. Rook holds at F3. |
| 5 | Vale recovers the ledger. Rook recovers the recorder. Jam and end the turn. | Vale recovers the ledger. Rook moves to E4. Jam and end the turn. |
| 6 | Vale to F5. Rook to D3 during the blackout. | Vale to F5. Rook recovers the recorder. |
| 7 | Rook to B3. | Rook to D3. |
| 8 | Rook to B1. Launch both pods. | Rook to B3. |
| 9 | Rook to B1. Launch both pods. |
Sending Rook to E3 on the first blackout fails either route. Restart stage 2 to retry from the handoff with both Twin charges. Reloading also resumes stage 2 from turn one while a handoff is pending. A first final extraction pays five chits. Carrying the phase map and extracting the field recorder earns the one-time full-clear chit. Final extraction consumes the checkpoint. A replay starts at the vault.
Forked Dispatch · choose a route and a tool at the junction
Clear Cascade Transfer to unlock Forked Dispatch. The first stage uses the Lower Works grid. Recover the routing orders and take the west lift in three turns, or follow the six-turn east hatch route with Rook’s transit cradle at F2. Extraction saves the handoff without paying chits.
At the handoff, choose a route and one compatible tool from the gear you own. Drain Haul offers Haul Line and Surge Suit. Relay Cut offers Twin Jammer and Scanner Jammer. Either branch can be launched without gear. The regular gear locker still applies outside the branch. Reloading before launch returns to the route choice. Reloading afterward restarts the selected branch at turn one. After a failure, restart with the same plan or return to the junction to choose again with the saved cargo.
| Turn | Drain Haul with Haul Line | Relay Cut with Twin Jammer |
|---|---|---|
| 1 | Both to B4. | Vale to C3. Rook to B4. |
| 2 | Vale to D4. Rook waits. | Vale to E3. Rook to C4. |
| 3 | Vale to E3. Rook to C4. | Vale to E5. Rook to D3. Jam. |
| 4 | Vale to F2. Rook starts the pump. | Vale to D5. Rook to E4 during blackout. |
| 5 | Vale escorts the courier. Rook uses the line to F4. | Vale recovers the log. Rook packs the exciter if carrying the cradle. Jam. |
| 6 | Vale to F3. Rook recovers the sample. | Vale to F5. Rook to D3 during blackout. |
| 7 | Both to G3. Extract. | Rook to B3. |
| 8 | Rook to B1. Launch both pods. |
The first final extraction pays four chits. Drain’s sample adds one. Relay’s exciter requires the cradle and adds two. The bank keeps the larger premium, so a Relay delivery after a Drain sample pays one more chit. Repeating the best result pays zero.
Sealed Works · retrieve the core from a collapsing chamber
Lower Works’ west lift is sealed. F2 collapses at the end of turn five, so Rook can use the Recovery Hook to rig the core from F3. F3 itself collapses at the end of turn six.
| Turn | Full salvage with the Recovery Hook |
|---|---|
| 1 | Vale to B2. Rook to C3. |
| 2 | Vale recovers the ledger. Rook shores D3. |
| 3 | Vale to C3. Rook to E3. |
| 4 | Vale to E3. Rook to F3. |
| 5 | Vale to G3. Rook rigs the core with the hook. |
| 6 | Rook to G3. Extract. |
For a ledger-only run, leave Rook at E3 on turn four and move both directly to G3 on turn five. A full first extraction pays four chits. Ending turn five with Rook on F2 verifies the collapse even if the core has been rigged.
Spring Tide · split the crew around the flood
The pump control at C4 floods at the end of turn two. Rook can still reach it after the first surge and divert the turn-six surge. The Surge Suit gives the crew another route and leaves Rook free to reach the recorder earlier.
| Turn | Pump and Haul Line | Bypass with Surge Suit |
|---|---|---|
| 1 | Both to B4. | Both to B4. |
| 2 | Vale to D4. Rook waits. | Both to D4. |
| 3 | Vale to E3. Rook to C4. | Both to E3. |
| 4 | Vale to F2. Rook starts the pump. | Vale to F2. Rook to F4. |
| 5 | Vale escorts the surveyor. Rook uses the line to reach F4. | Vale escorts the surveyor. Rook recovers the recorder. |
| 6 | Vale to F3. Rook recovers the recorder. | Vale to F3. Rook to G3. End the turn to use the suit. |
| 7 | Both to G3. Extract. | Vale to G3. Extract. |
The pump route can clear without gear. Walk Rook through E4 and F4 on turns five and six, then extract on turn seven. This leaves the recorder behind. A full first extraction pays four chits.
Manga references for the next contracts
Overgeared · gear that changes the jobs you can take. In Ize Press’s volume 2 description, Grid agrees to protect Khan’s smithy from the Mero Company with a chance at Pagma’s sword and armor. By the volume 4 description he has accumulated equipment, levels and fighting experience and heads to Kesan Gorge for his class quest in pursuit of Sword Dance. These are volume-level setup details. The exact quest rewards and entry conditions are outside this reading. Ize Press volume 2 · Ize Press volume 4
For a future contract, have the crew protect a workshop and bring back a winch head. The new attachment could let Rook anchor one crew member across a broken span. The standard gear would still offer a safe route by the stairs. Test whether recovering the attachment feels like a new way to play the map.
The Dungeon Cleaning Life of a Once Genius Hunter · knowing the danger without having the old tools. The WEBTOON synopsis sets up Junu Kim’s regression and locks his hunter skills behind work as a cleaner. Late in episode 2, the story identifies the expected boss of the yellow-level dungeon as the Foxtrot Centipede and depicts it before resolving the encounter. This is an early episode spoiler about identification. WEBTOON series · WEBTOON episode 2
For a future contract, add a cleanup sortie on a map the crew already knows. The crew can clear a drain and return a trapped worker, opening a shortcut in the next contract. Test whether players remember the map’s forecast when the objective changes and can explain why a support job changed the next route.
Pick Me Up · learning a raid pattern has a cost. In the licensed premise, Seojin treats low-rank heroes as expendable while learning boss attack patterns. Becoming a one-star hero himself puts him on the side that bears the cost. This observation is from the publisher’s description. Tapas series
For a future contract, make a dropped sensor recoverable as an optional objective. Its map overlay could teach the pattern of a moving hazard on later attempts. Keep the basic hazard forecast visible from the start and keep chits tied to extraction. Test whether players value an easier-to-read pattern enough to spend a turn recovering the sensor.
First playtest observations to collect
- Before explaining controls, ask the player to indicate which tile will collapse next and which crew member can change the turn-two forecast. Watch whether they use the map, the timeline or both.
- Record the first result, whether the player deliberately left the core behind, and the turn on which the choice became clear to them. A safe win is a legitimate extraction outcome.
- On the second attempt, ask the player to try the other route. Check whether the special-action timing and the requirement to finish at the same exit are clear before the final turn.
- Repeat with keyboard input only. Check crew selection, arrow navigation and Enter on a dashed cell, special orders, the exit and restarting.
- After a first payout, have the player pick a tool before reading a harder-contract walkthrough. Ask which planned move the tool changes and watch whether they understand when it is spent.
- Compare the two electrical contracts after Blackout Relay. Check whether players see that Live Freight offers a choice between grounding and jamming, while Interlock Station needs the physical gate open in either route.
- Have a player choose between keeping the original jammer and buying an upgrade. On Bus Coupler, check whether they understand why the other tile still arcs. On Double Feed, check whether they can reserve the second charge and plan the two turns without forecast.
- In Cascade Transfer, observe whether a player sees the value of recovering the phase map before committing to the vault exit, and whether they can recover from a missed return crossing without replaying the vault.
Deterministic checks cover standard and hard-contract routes, gear limits and charges, one-time rewards, and migration. Automated Chrome checks cover the purchase, hard win, failure, restart and reload loop. Human playtest observations remain to be collected.